With the help of a buddy, we spent the better part of Thursday and Friday getting the M340i dialed in for winter. I'll list out what products were used in case anyone is interested. Side note, if anyone
does decide to purchase any products from Obsessed Garage, I'd kindly ask that you do so through my affiliate link (in my signature).
 Thursday - Day 1
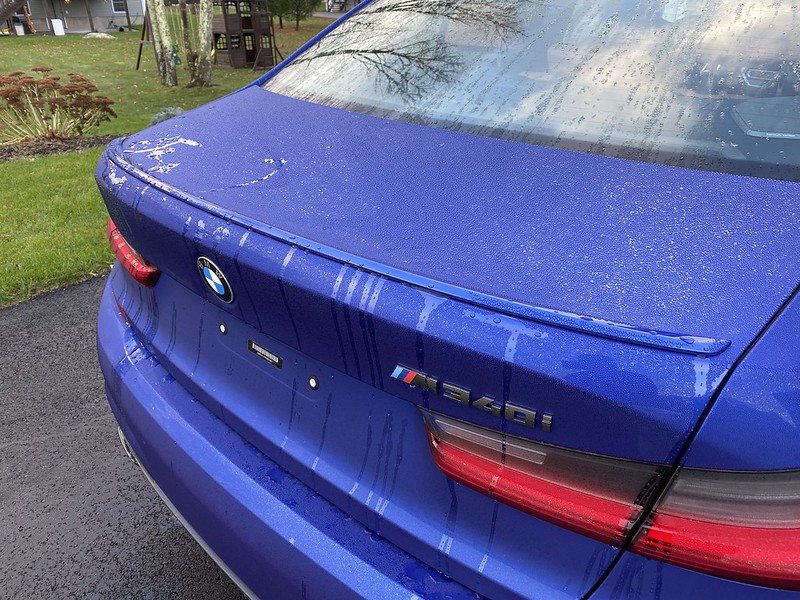
Prior to washing, I removed the stock lip spoiler using fishing line. I then used heat, 3M adhesive remover and my fingers to try and get rid of the remaining adhesive, but after some time (and a bunch of blisters), I gave up and decided I would get back to it after washing the vehicle.

 Decontamination
Step 1: I started off the day by giving the car a quick rinse using my pressure washer setup. I then gave it a proper decontamination wash using the Obsessed Garage Decon Soap. Did this via the two bucket method, along with my MTM PF22.2 foam cannon.
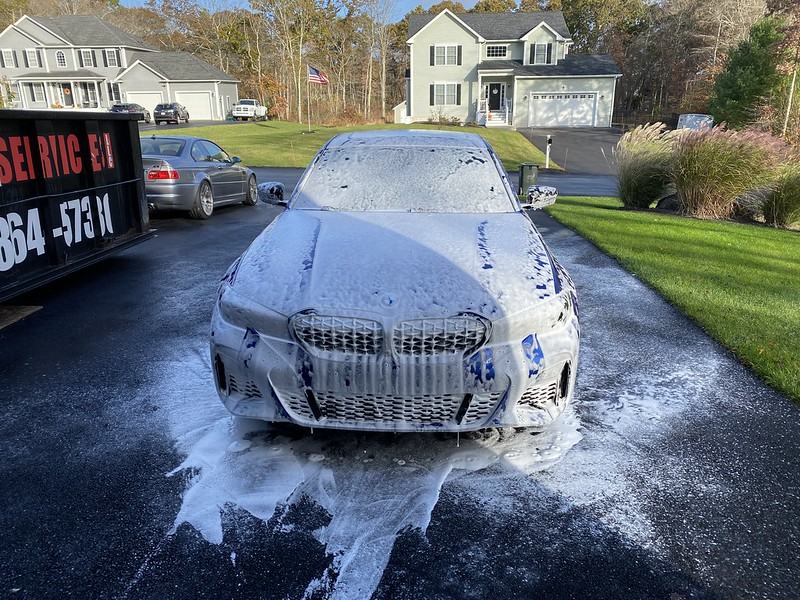
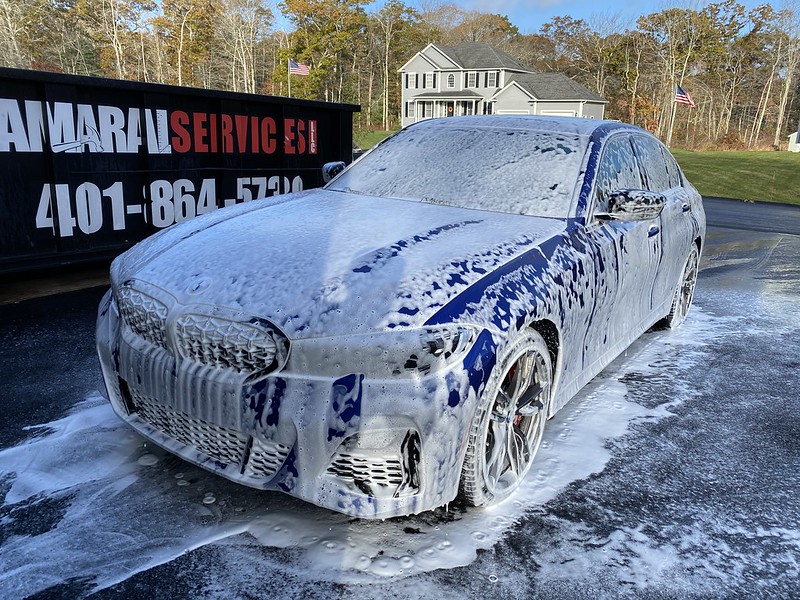
Step 2: After rinsing the car off again, I covered the vehicle in Adam's Iron Remover. I let this sit on the car for about 4-5 minutes (do NOT let this dry on the paint), then rinsed the car off again.
Step 3: Prior to "claying" the paint, as the sun was starting to break through the clouds, I pulled the car into the garage. Next, I got my bottle of NanoSkin Glide, and went to town "claying" the paint, panel by panel, using both the AutoScrub pad and sponge (for the smaller/harder to reach areas), being sure to heavily lubricate each panel while doing so.

After the entire car was clayed, I pulled it back out of the garage and my buddy rinsed it off yet again.

I then pulled back into the garage and used my EGO 530 leaf blower to dry off the car and get it ready for polishing:
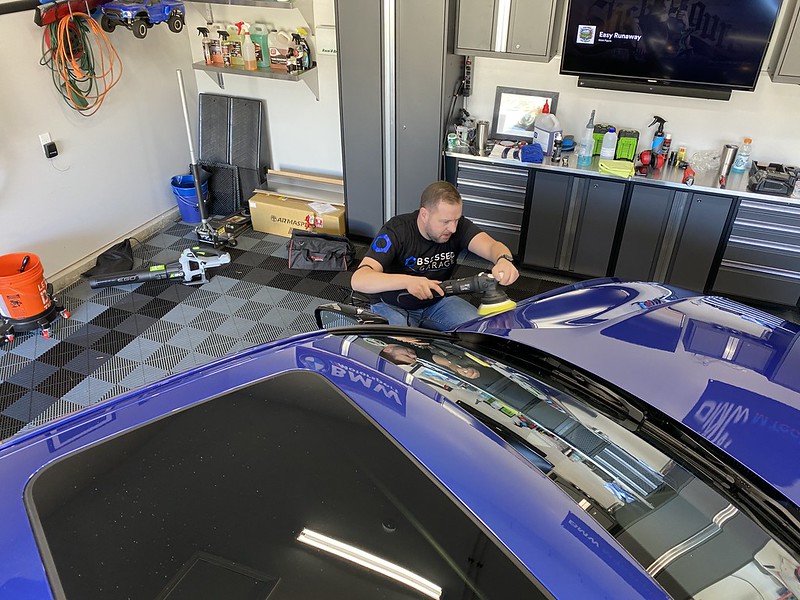
Paint Correction
My buddy and I both polished the vehicle, each basically doing 1/2 the car, straight down the middle. We each used Maxshine M15 Pro Series II 15mm Dual Action Polishers w/ 5" Rupes fine polishing pads, along with Sonax Perfect Finish. We also used my Adam's SK Micro DA Polisher w/ 1" Rupes fine polishing pads, as well as my buddies 3" Griots DA, when needed.


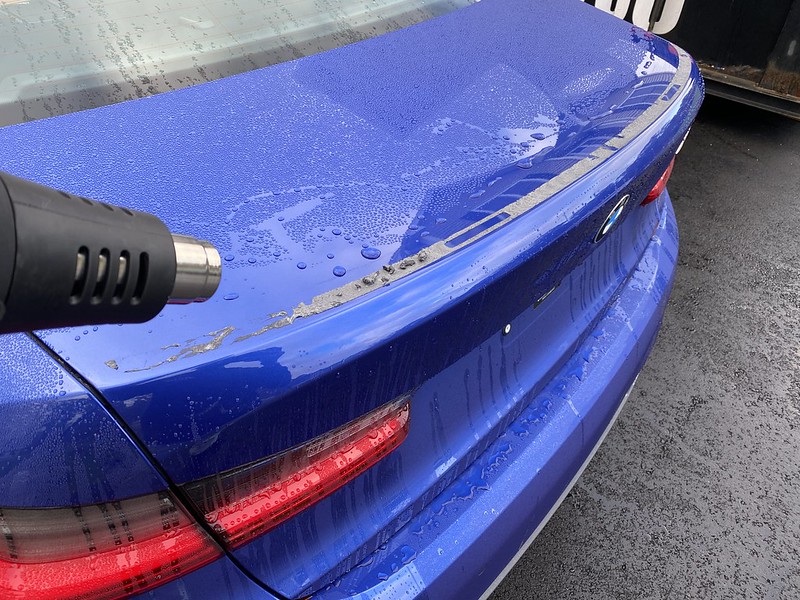
Getting back to the rear spoiler adhesive. We ran out to grab some Five Guys for lunch and before doing so, I picked this up at Advanced Auto Parts and even though I scoffed at the price ($44.99, I believe), it would up being worth EVERY penny.


This thing got the remaining adhesive off in minutes...cut through it like butter and left the paint with only minimal marring that the paint correction would address, anyway:


Applied more 3M double-sided tape on the AA Concepts M Performance style rear spoiler:

Prior to mounting, I wiped down the trunk with CarPro Eraser to ensure proper adhesion.
Here we are test fitting the spoiler:


And finally, tape removed and mounted:

Now, we moved onto the fun part. Applying one coat of Jescar Power Lock Plus Polymer Paint Sealant using the Adam's Wax/Sealant Hex Grip Applicator Pads. After letting the car cure for about 30 minutes, we wiped off using clean microfiber towels.
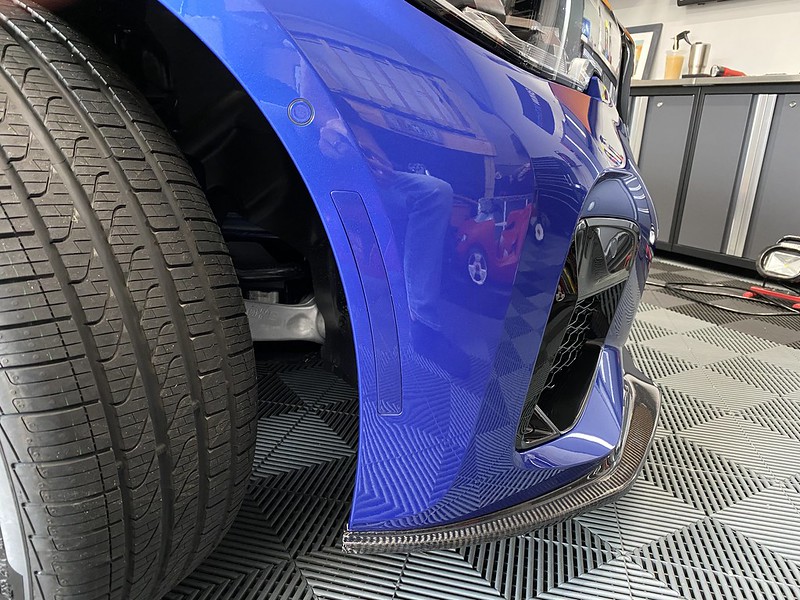
We then put the car up on ramps to make it easier to mount and drill the self-tapping screws for the AA Concepts front lip:


Here is where we called it a night and my buddy went home. However, I went back out later after my two boys went to bed and applied the first layer of Collinte 845, again using an Adam's Hex Grip Applicator pad. By the time I got the whole car covered, it was time to go and wipe off with clean mf towels. Doing it before bed allowed the first layer of 845 to fully cure overnight before we would apply the 2nd and final coat.
Exhausted and sore, it was now time for bed.
Friday - Day 2
I woke up Friday morning and the first thing I did was get the car off the ramps. I then installed my IND-Distribution painted side markers:


Next up, using Bead Maker and clean mf towels, I cleaned all the door jambs and trunk jambs, as well as all the painted areas under the hood.

I then prepped the tires for tire dressing using Stoner Tarminator and a wheel mf towel.
My buddy showed up again right after breakfast and together we applied the 2nd coat of Collinite 845, then wiped off.
After that, we got the interior and exterior glass dialed in using Stoner Invisible Glass. My buddy applied the CarPro Perl tire dressing with a RaceGlaze XL brush and we let that sit and soak in while we coated all the exterior glass with Adam's Polishes Glass Sealant. We used Adam's Glass Boost and the Stoner Invisible Glass to wipe the glass sealant off. We ended up going with 2 coats on just the windshield.
Once the windows were properly coated, I used a clean MF wheel towel to wipe off the excess Perl.

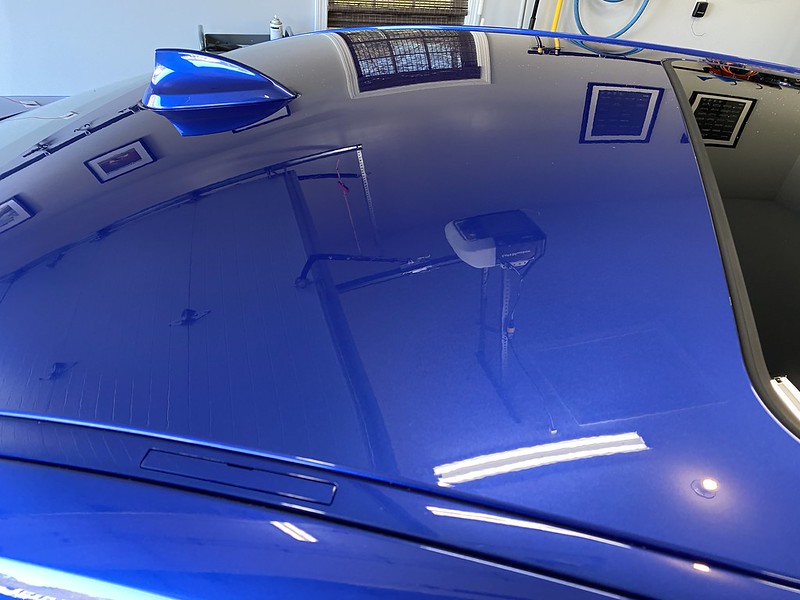
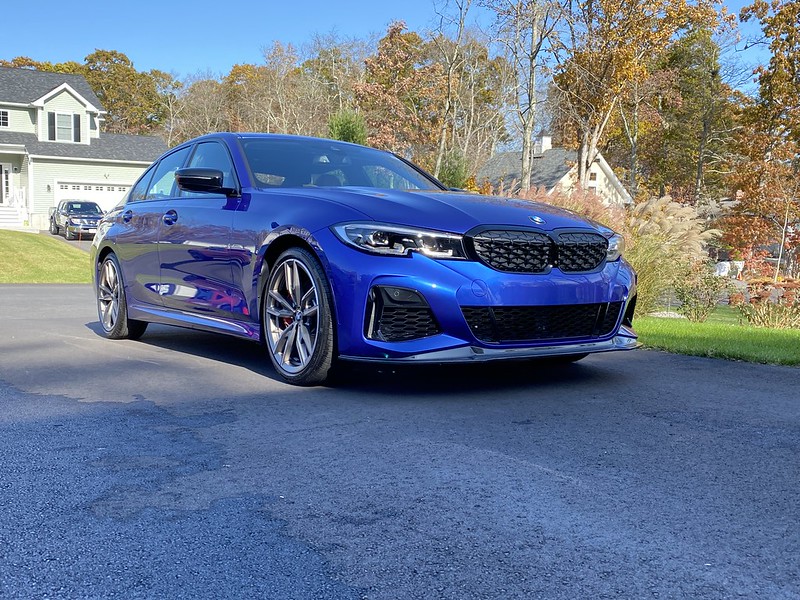
And once all that was done, I pulled the car out of the garage to check it out under the sun and man were we impressed with the results. Even though the car was brand new and I drove it home with 6 miles on the odometer, I was still shocked at the excellent condition of the paint from the factory. Hence the 1 step correction. That's truly all it needed. Here is the finished product:


Products used:
- Obsessed Garage Decon Soap
- MTM PF22.2 Foam Cannon
- Adam's Polishes Iron Remover
- NanoSkin Glide
- NanoSkin AutoScrub pad
- NanoSkin AutoScrub sponge
- Rupes 5" Fine Polishing Pads
- Rupes 1" Fine Polishing Pads
- 3M Adhesive Eraser Wheel
- CarPro Eraser
- Sonax Perfect Finish
- Jescar Power Lock
- Adam's Wax/Sealant Hex Grip Applicator Pads
- Collinite 845
- P&S Bead Maker
- Stoner Tarminator
- Stoner Invisible Glass
- CarPro Perl
- RaceGlaze XL Brush