
 ❯ Help! How is this style of photography done?
| 01-22-2010, 02:11 PM | #1 |
|
Lieutenant Colonel
 
265
Rep 1,696
Posts |
Help! How is this style of photography done?
   The car appears bright and vibrant. The background is a gloom,y dull, near black and white but not quite, with small hints of color. What camera settings are used? What are the processing steps taken in Photoshop? Keep in mind, I'm very new to photography and photoshop so please keep explanations to laymen's terms! I have a Nikon D5000 and Photoshop CS4, btw. Thanks for any input! |
| 01-22-2010, 03:55 PM | #2 |
|
Private First Class
 
9
Rep 142
Posts |
Not sure of settings for camera, I'm sure
you can right-click, save as and open in a photo program that displays the parameters of the photo such as iso, fstop, etcc.. Background could be a gradient tool or just clouds and the colors een modified/balanced/toned.. Many different techniques can be used. Those particular pics you best asking the owner what they used.. Your best bet in photoshoots, generally are overcast, back to sunlight, and use a tripod, test different settings to see what results you get. Compare it to an auto picture and your manual pics.. Hope this helps a little
__________________
| 2008 E92 A/W | 6spd | saddle brown | loaded | black roof | blacked out tails | matte black grilles | black/white roundels | h&r sports | intake | jb3 | custom exhaust | passport 8500 |
|
|
Appreciate
0
|
| 01-22-2010, 04:07 PM | #3 |
|
307
Rep 3,635
Posts
Drives: R56 Cooper S
Join Date: May 2009
Location: 4015 E Leaverton Court, Anahiem, CA 92807
|
One way to do something like that is:
1. Open photo in PS 2. Add a new layer on top of it 3. Make that new layer an "Overlay" 4. Using black and white brushes (black to darken, white to brighten) at varying opacity, paint the image in the overlay layer to get the exposures you want. Make sure to not make it obvious (the photos you posted have really bad halo effects around the areas that were touched.) 5. You will also want to sponge out some saturation in the background or paint a layer mask on a desaturated layer. |
|
Appreciate
0
|
| 01-22-2010, 05:31 PM | #5 | |
|
Lieutenant Colonel
265
Rep 1,696
Posts |
Quote:
Anybody else have any techniques they'd like to share in Photoshop? |
|
|
Appreciate
0
|
| 01-22-2010, 10:16 PM | #6 |
|
Free Thinker
16789
Rep 7,454
Posts |
If you have Photoshop, open the full color image and under the Layer menu choose New Adjustment Layer and then Hue/Saturation. In that layer slide the saturation slider until you get the relative dullness you want of the background. Then choose an appropriate eraser brush size and "erase" the car. You'll see the original bright colors coming through.
This took about 3 minutes. 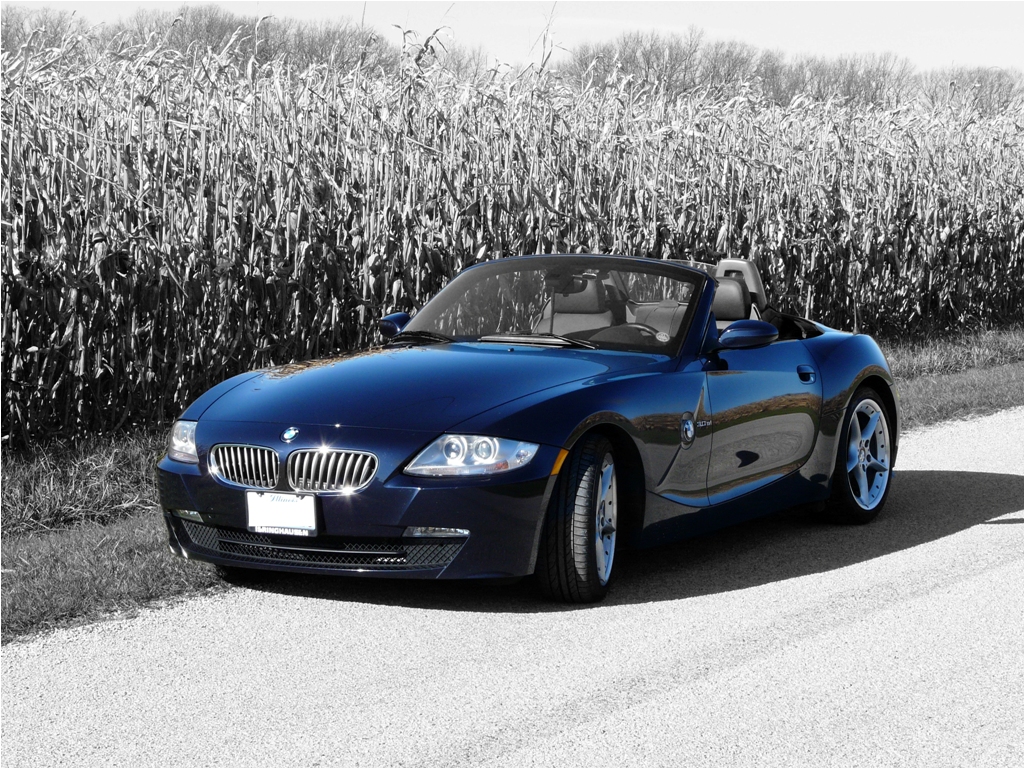
__________________
|
|
Appreciate
0
|
| 01-23-2010, 02:12 AM | #7 |
|
Lieutenant Colonel
265
Rep 1,696
Posts |
M_Six: Ok, I was able to do everything you said and get the saturation slider to the saturation point I want. Then, I select the Eraser tool and try to erase the car, nothing happens. Which layer should I be in when using the Eraser tool? The original Background or my Hue/Saturation layer? If I'm in the Hue/Saturation layer, I cannot erase anything. If I'm in the background layer, I erase everything turning everything solid white.
|
|
Appreciate
0
|
| 01-23-2010, 02:38 AM | #8 |
|
Lieutenant Colonel
265
Rep 1,696
Posts |
Thanks for the help. I did it a different way. I first made a duplicate layer from the original picture. On this duplicated layer, I clicked "IMAGE" and chose "Hue/Saturation." I turned the Saturation down to the left. Then I clicked on the Erasure tool and "erased" the car from said duplicated layer. I played around with the curves a little bit on the main background layer. I did this in only 15 min!
 |
|
Appreciate
0
|
| 01-23-2010, 08:48 AM | #9 | |
|
General
 
1566
Rep 29,202
Posts |
Quote:

__________________
 F10 520d M-Sport Alpine White | HRE P43SC 20x9+20x11 | Michelin PSS 255/35+295/30 | KW V3 Coilover | M5 Front Sway Bar + M550d Rear Sway Bar | 3DDesign Front Lip | BMW M Performance CF Spoiler | BMW M Performance Diffuser | BMW M Performance Black Grills | BMW M Performance Pedals | |
|
|
Appreciate
0
|
| 01-23-2010, 09:43 AM | #10 |
|
Free Thinker
16789
Rep 7,454
Posts |
I don't know, I've been using the Eraser tool in the New Adjustment-Hue/Saturation layer. The directions were in a Digital Photographer mag I bought. I'm no PS guru, so I can't tell you why it works differently for others. Maybe different versions of PS?
Still, as long as you got it to work. Looks sharp.
__________________
|
|
Appreciate
0
|
| 01-23-2010, 11:00 AM | #11 | |
|
General
1566
Rep 29,202
Posts |
Quote:
But the trick is that when you use the eraser tool the foreground color needs to be white, but when using the brush tool, the foreground color has to be black.
__________________
F10 520d M-Sport Alpine White | HRE P43SC 20x9+20x11 | Michelin PSS 255/35+295/30 | KW V3 Coilover | M5 Front Sway Bar + M550d Rear Sway Bar | 3DDesign Front Lip | BMW M Performance CF Spoiler | BMW M Performance Diffuser | BMW M Performance Black Grills | BMW M Performance Pedals | |
|
|
Appreciate
0
|
| 01-25-2010, 01:29 AM | #12 |
|
Banned

631
Rep 24,685
Posts
Drives: '04 330i ZHP
Join Date: Dec 2007
Location: Chicago Burbs
|
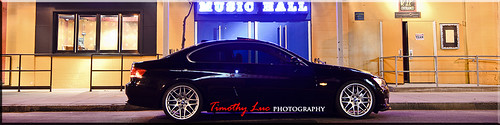
there is also a preset in hue/satuation called "old style" that does it for you nicely.
(example #1 not that its a good photo or anything). Other option would be leave the saturation alone on the back ground and just decrease the vibrance. (example #2 - used -85 vibrance) last but not least the tonal range (mid tone contrast) looks high on his photos (example 3 - added midtone contrast from example 2) |
|
Appreciate
0
|
| 01-25-2010, 01:33 AM | #13 |
|
Banned
631
Rep 24,685
Posts
Drives: '04 330i ZHP
Join Date: Dec 2007
Location: Chicago Burbs
|
BTW frankzlin those originals are also probably HDR's.
|
|
Appreciate
0
|
| 01-25-2010, 01:52 AM | #14 |
|
Brigadier General
181
Rep 4,038
Posts |
They are hdr's
Get a program called photomatix Set your camera up in bracket mode to take -2 0 +2 exposures (if you only have one picture you can make them in photoshop or lightroom) open up photomatix and upload the 3 images hit make hdr and your pretty much done use the sliders to make it how you want it. From there you can go to photoshop and do more but you get the idea. For a full how to go to www.hdrcreme.com and click the how to at the top here is one i did today 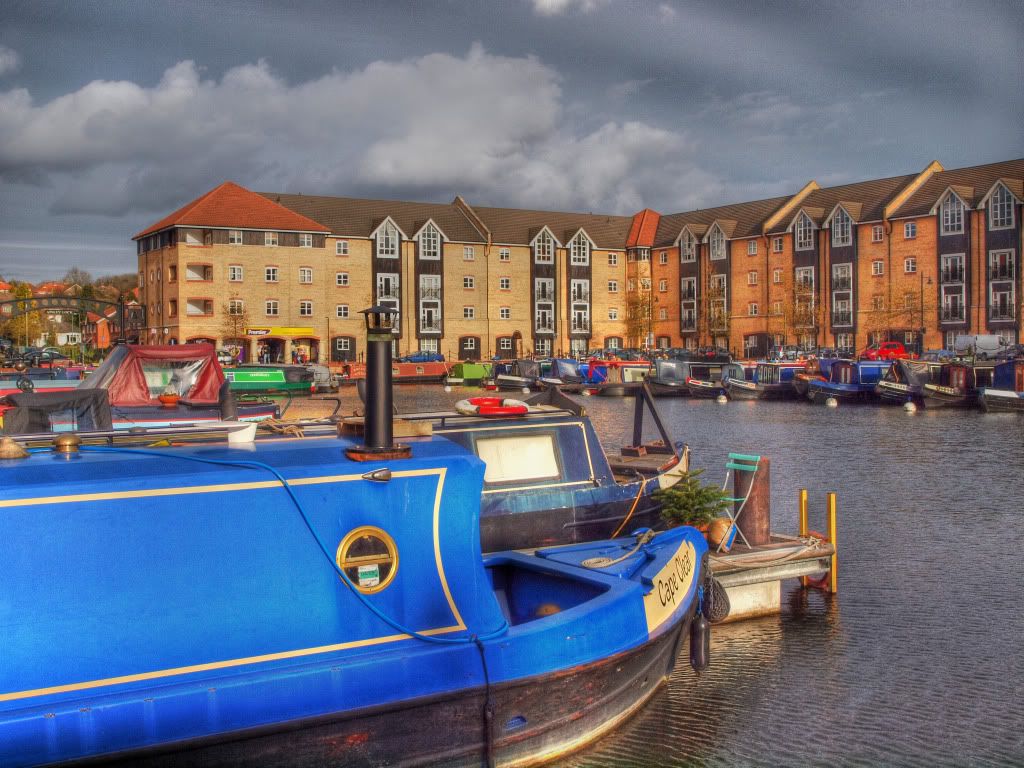 |
|
Appreciate
0
|
| 01-25-2010, 04:04 PM | #15 |
|
Brigadier General
283
Rep 3,102
Posts
Drives: Happy on H&R coil overs
Join Date: Jan 2009
Location: The Hub
|
Def agree those first 2 pics are HDR
__________________
2008 E92 335xi ------->Links to my Mods: H&R Street Performance Coil Overs || 19" Alufelgen CS7 || Interior Swap: Black to Coral Red
 My Website || My Flickr || My Tumblr || My Twitter|| My Facebook|| My 500px |
|
Appreciate
0
|
| 01-26-2010, 10:53 AM | #16 |
|
Lieutenant Colonel
265
Rep 1,696
Posts |
Thanks for the tips. Photoshop CS4 can also create HDR pics by merging three exposure originals into one image. I'm not impressed with the CS4 HDR capability, but that's probably because I don't know what I'm doing. The HDR generated images I make from Photoshop seem to be dull. I haven't tried photomatix before.
|
|
Appreciate
0
|
| 01-26-2010, 11:52 AM | #18 | |
|
Apex Everything!
976
Rep 4,378
Posts
Drives: 2007 Honda S2000, 2017 GT350
Join Date: Sep 2008
Location: Cedar Park, TX
|
Quote:
__________________
2011 E92 M3(Sold). 2007 Honda S2000 (Track Car). 2016 Cayman GT4 (Sold). 2017 Shelby GT350 (AKA Crowd Killer).
My pet project: https://stickershift.com |
|
|
Appreciate
0
|
| 01-26-2010, 12:39 PM | #20 | |
|
Banned
631
Rep 24,685
Posts
Drives: '04 330i ZHP
Join Date: Dec 2007
Location: Chicago Burbs
|
Quote:
|
|
|
Appreciate
0
|
| 01-26-2010, 01:45 PM | #22 |
|
Banned
631
Rep 24,685
Posts
Drives: '04 330i ZHP
Join Date: Dec 2007
Location: Chicago Burbs
|
 |
|
Appreciate
0
|
Post Reply |
| Bookmarks |
| Thread Tools | Search this Thread |
|
|


